The Basics of Flutter Testing: A Simplified Guide
June 27, 2023
-12 min read
Introduction
In mobile app development, keeping your apps reliable and stable is really, really important. Testing plays a crucial role in achieving this goal, allowing developers to catch bugs early, verify functionality, and maintain the quality of their codebase.
In this article, we'll create and test a basic Flutter app.
Create an App to Test
Run the following command in your terminal to generate a new app:
flutter create demo_note_taking_app
Add Necessary Dependencies
For state management, add GetX:
flutter pub add get
For End-to-End testing, add integration_test:
flutter pub add --dev --sdk=flutter integration_test
For advanced testing capabilities on real devices and emulators, add flutter_driver:
flutter pub add --dev --sdk=flutter flutter_driver
For standard testing, add test:
flutter pub add --dev test
Build the App
Let's begin building the app. We've got a few key files to work with:
• lib/controllers/notes_controller.dart: This file is where we'll manage all our notes.
• lib/screens/add_new_note_screen.dart: Sets up the layout for adding new notes.
• lib/screens/home_screen.dart: This is where we'll showcase the notes.
• lib/main.dart: The main file where the app begins execution.
First, setup the Notes controller by following these steps:
1. Create a new directory named controllers within lib.
2. Inside controllers, add a file named notes_controller.dart.
3. Add the following code to the notes_controller.dart file:
  // lib/controllers/notes_controller.dart

  import 'package:get/state_manager.dart';

  class NotesController extends GetxController {
    final RxList<String> _notes = <String>[].obs;

    List<String> get items => _notes;

    void add(String note) {
      _notes.add(note);
    }

    void remove(String note) {
      _notes.remove(note);
    }
  }
Adding the Home Screen
Create a file named home_screen.dart within lib/screens, and write the following code:
  // lib/screens/home_screen.dart

  import 'package:flutter/material.dart';
  import 'package:get/get.dart';
  import '../controllers/notes_controller.dart';
  import 'add_new_note_screen.dart';

  class HomeScreen extends GetView<NotesController> {
    const HomeScreen({super.key});

    @override
    Widget build(BuildContext context) {
      Get.put(NotesController());
      return Scaffold(
        appBar: AppBar(
          title: const Text('Demo Note-Taking App'),
        ),
        body: Obx(
          () => ListView.builder(
            itemCount: controller.items.length,
            cacheExtent: 20.0,
            padding: const EdgeInsets.symmetric(vertical: 16),
            itemBuilder: (context, index) => ItemTile(controller.items[index]),
          ),
        ),
        floatingActionButton: FloatingActionButton.extended(
            onPressed: () => {Get.to(() => const AddNewNoteScreen())},
            label: const Text('New Note')),
      );
    }
  }

  class ItemTile extends GetView<NotesController> {
    final String note;

    const ItemTile(this.note, {super.key});

    @override
    Widget build(BuildContext context) {
      return Padding(
        padding: const EdgeInsets.all(8.0),
        child: ListTile(
          tileColor: Colors.blueGrey.shade100,
          title: Text(
            note,
            key: Key('${note}_title'),
          ),
          trailing: IconButton(
            key: Key('${note}_icon'),
            icon: const Icon(Icons.delete),
            onPressed: () {
              controller.items.contains(note) ? controller.remove(note) : null;
            },
          ),
        ),
      );
    }
  }
Adding the AddNewNote Screen
In lib/screens, create add_new_note_screen.dart file, and paste the following code:
  // lib/screens/add_new_note_screen.dart

  import 'package:flutter/material.dart';
  import 'package:demo_note_taking_app/controllers/notes_controller.dart';
  import 'package:get/get.dart';

  class AddNewNoteScreen extends StatefulWidget {

    const AddNewNoteScreen({super.key});
    @override
    AddNewNoteScreenState createState() => AddNewNoteScreenState();
  }

  class AddNewNoteScreenState extends State<AddNewNoteScreen> {
    TextEditingController titleController = TextEditingController();
    final NotesController controller = Get.put(NotesController());

    @override
    Widget build(BuildContext context) {
      return Scaffold(
        appBar: AppBar(
          title: const Text('Add New Note'),
        ),
        body: Padding(
          padding: const EdgeInsets.all(16.0),
          child: Column(
            crossAxisAlignment: CrossAxisAlignment.stretch,
            children: [
              TextField(
                controller: titleController,
                decoration: const InputDecoration(
                  labelText: 'Title',
                ),
              ),
              const SizedBox(height: 20.0),
              ElevatedButton(
                onPressed: () {
                  String title = titleController.text.trim();
                  if (title.isNotEmpty) {
                    String title = titleController.text.trim();
                    if (title.isNotEmpty) {
                      controller.items.add(title);
                      titleController.clear();
                      Get.back();
                    } else {
                      ScaffoldMessenger.of(context).showSnackBar(
                        const SnackBar(
                          content: Text('Please enter a title'),
                        ),
                      );
                    }
                  } else {
                    ScaffoldMessenger.of(context).showSnackBar(
                      const SnackBar(
                        content: Text('Please enter a title'),
                      ),
                    );
                  }
                },
                child: const Text('Save'),
              ),
            ],
          ),
        ),
      );
    }
  }
Updating the Main File
Update lib/main.dart with the provided code snippet:
  // lib/main.dart

  import 'package:flutter/material.dart';
  import 'package:get/route_manager.dart';
  import 'screens/home_screen.dart';

  void main() {
    runApp(const DemoNoteTakingApp());
  }

  class DemoNoteTakingApp extends StatelessWidget {
    const DemoNoteTakingApp({super.key});

    @override
    Widget build(BuildContext context) {
      return GetMaterialApp(
        title: 'Demo Note-Taking App',
        theme: ThemeData(
          primarySwatch: Colors.blue,
          useMaterial3: true,
        ),
        home: const HomeScreen(),
      );
    }
  }
That's it!
Run the app. It should kinda look like this:
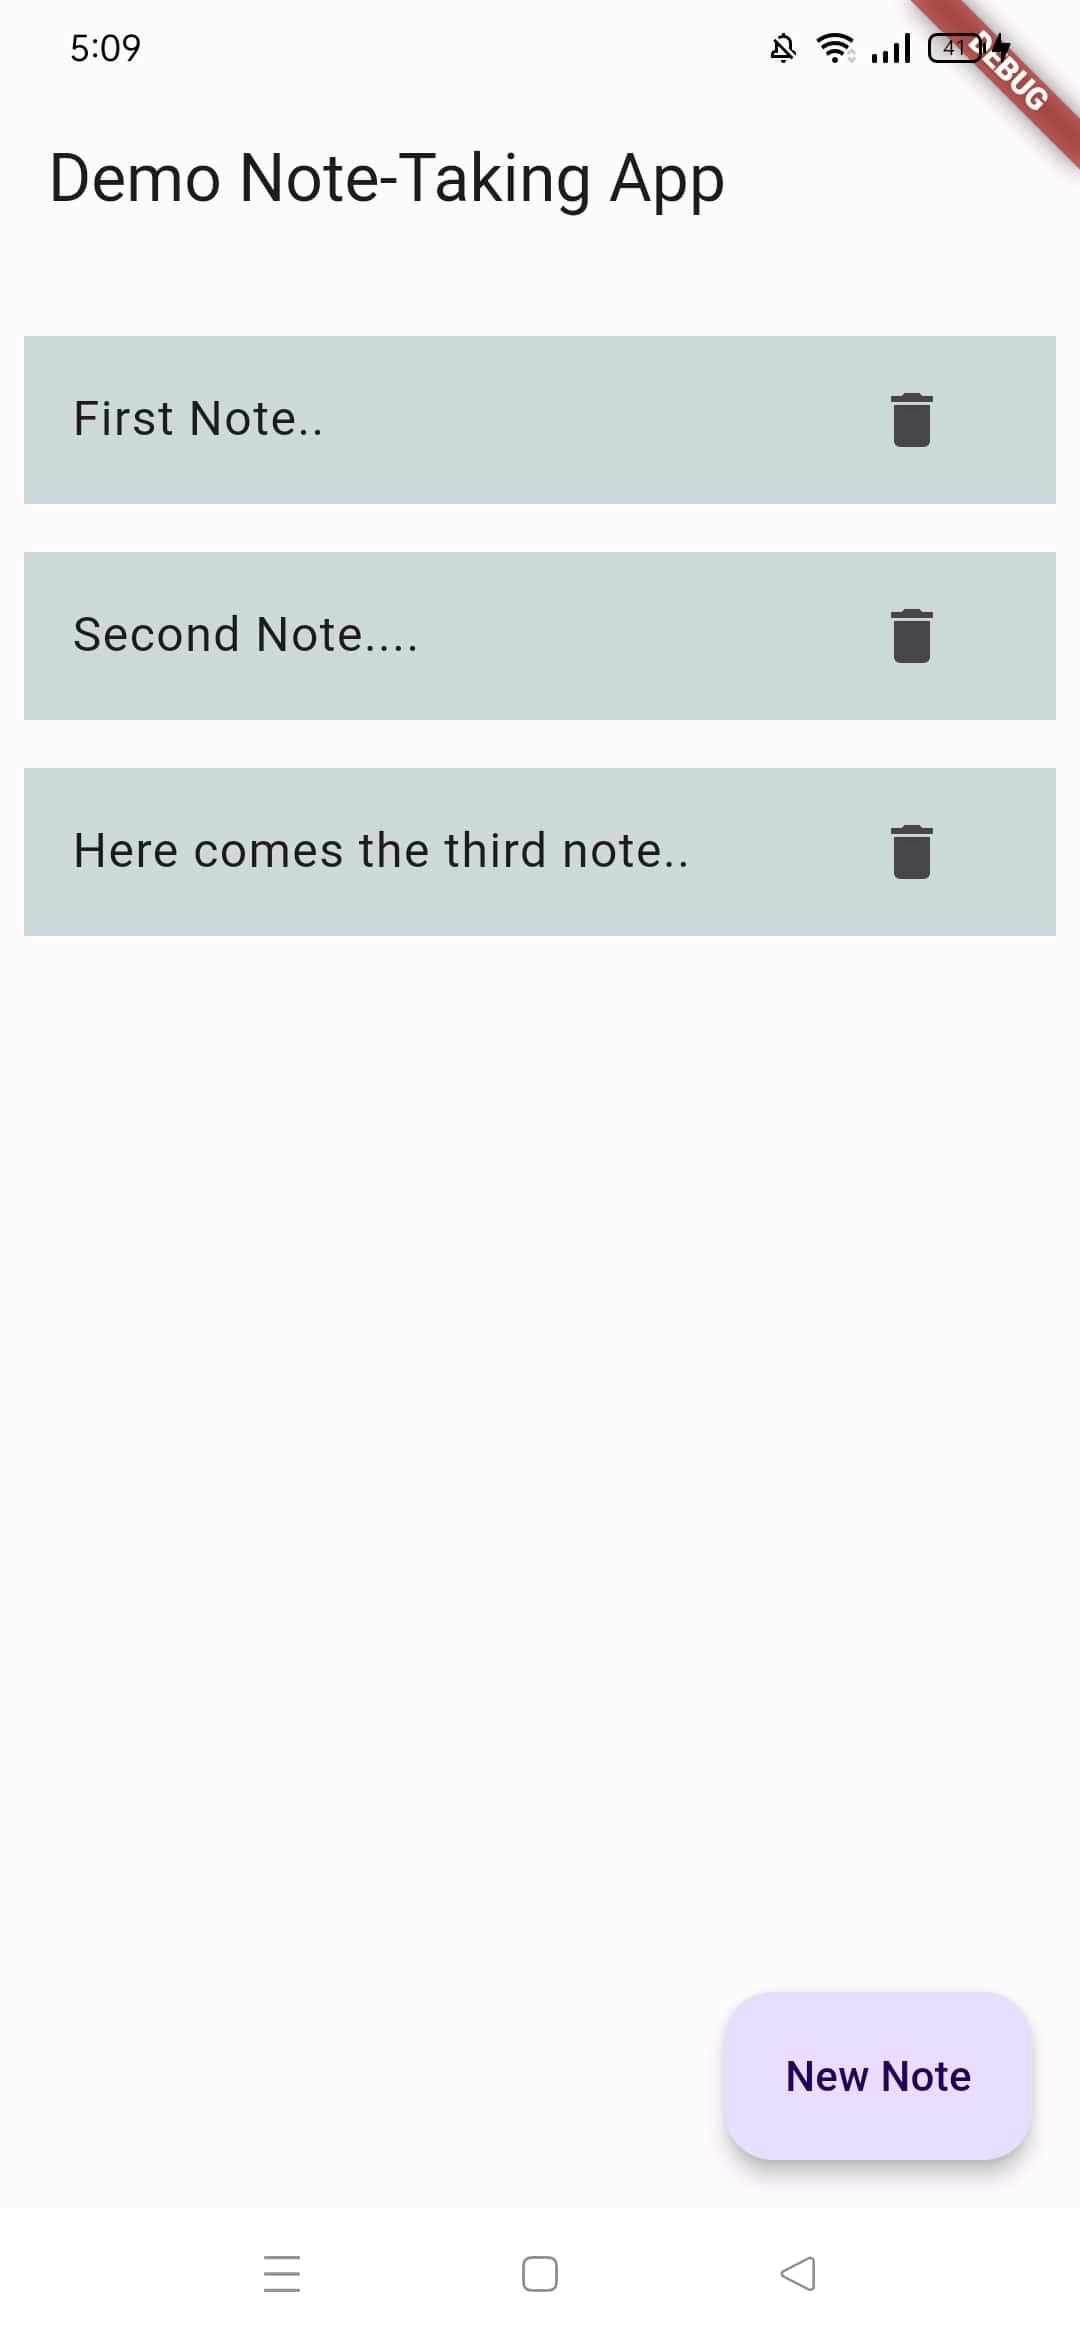
Now, let's test it.
Flutter facilitates testing by automatically including the flutter_test library upon project creation. This library enables Flutter to efficiently execute and analyze tests. Flutter also creates a test folder for storing tests. It's important not to rename or move this folder, as it will break the test functionality. Additionally, always include _test.dart at the end of test file names so that Flutter can identify them correctly.
Unit Testing
Let's start by unit testing the NotesController controller. What is a unit test? A process of testing individual units or components of your application in isolation to ensure they work as expected. In Flutter, unit tests typically focus on testing functions, methods, or classes independently from the rest of the application.
In a Flutter app, all test files, except for integration tests, are placed within the test directory.
Delete the default files
Delete the default test/widget_test.dart file before we begin testing. We will create our own test files.
We'll start by testing the add() method in the NotesController controller to ensure that a new item is successfully added to the list and that the list reflects the update.
In Flutter, we usually follow this convention where the test directory structure mirrors that of the lib directory, and the dart files within the test directory has the same name as its counterpart in the lib directory, with "_test" appended. So, create a controllers directory in the test directory. In this new directory, create a notes_controller_test.dart file with the following content:
  // test/controllers/notes_controller_test.dart

  import 'package:test/test.dart';
  import 'package:demo_note_taking_app/controllers/notes_controller.dart';

  void main() {
    group('Testing Notes Controller', () {
      var notes = NotesController();

      test('A new note should be added', () {
        var note = 'This is the test title of the new note';
        notes.add(note);
        expect(notes.items.contains(note), true);
      });
    });
  }
In Flutter testing, you can organize similar tests into groups, which is pretty handy. Within a single test file, you're free to create multiple groups. Each group is meant to test different parts of the corresponding file in the lib directory.
When using the test() method, you'll notice it requires two things: a description, which explains what the test is doing, and a callback function where you'll actually write the test logic.
Next up, we'll test removing a note from the list. Within the same Testing Notes Controller group, paste the following code:
    // test/controllers/notes_controller_test.dart

   test('A note should be removed', () {
      var testNote = 'Here comes the title of the test note... blah blah';
      notes.add(testNote);
      expect(notes.items.contains(testNote), true);
      notes.remove(testNote);
      expect(notes.items.contains(testNote), false);
    });
Run the test
In your command line interface, navigate to the project's root directory, then type and enter the following command:
flutter test test/controllers/notes_controller_test.dart
If all tests pass, you should see something similar to the following message in the terminal:
00:04 +2: All tests passed!
Tip: If you want to run all the test files in the test directory at once, use: flutter test
Widget Testing
Widget testing in Flutter focuses on examining individual widgets or UI components to ensure their correct rendering and appropriate response to user interactions. Through widget tests, you can simulate user actions and validate the UI behavior of your application. This step tests the HomeScreen and AddNewNoteScreen screens individually.
Widget testing in Flutter introduces the testWidget() function, which substitutes the traditional test() function. Similar to test(), testWidget() also requires two parameters: a description and a callback. However, the callback for testWidget() differs as it accepts a WidgetTester as its argument.
In widget testing, we leverage TestFlutterWidgetsBinding, a class that equips your widgets with the resources they typically have in a live app environment. This includes essential details like screen dimensions and the capability to schedule animations. However, rather than executing within an actual app, tests run within a virtual environment. Here, the pumpWidget function initiates the process by instructing the framework to render and measure a specific widget just as it would in an application.
In the widget testing, various finders are available to locate widgets, such as text(), byType(), byIcon(), byKey(), and byTooltip(). Each helps pinpoint widgets based on their content, type, icon, key, or tooltip.
To verify your findings, you've got matchers like findsOneWidget, findsWidgets, matchesGoldenFile, and matchesSemantics. These handy tools let you confirm widget presence, appearance, and semantic attributes with ease.
Create a new test file
This test ensures that specific widgets are rendered correctly, checks if newly added notes appear, verifies that deleted notes are removed from the list, and confirms that tapping the floating button navigates to the AddNewNoteScreen.
  // test/screens/home_screen_test.dart

  import 'package:flutter/material.dart';
  import 'package:flutter_test/flutter_test.dart';
  import 'package:get/get.dart';
  import 'package:demo_note_taking_app/controllers/notes_controller.dart';
  import 'package:demo_note_taking_app/screens/home_screen.dart';

  void main() {
    setUp(() {
      // Initialize Get test mode
      Get.testMode = true;
    });

    testWidgets('HomeScreen UI Test', (WidgetTester tester) async {
      // Create a NotesController instance
      final NotesController notesController = NotesController();

      // Build our widget and trigger a frame.
      await tester.pumpWidget(MaterialApp(
        home: HomeScreen(controller: notesController),
      ));

      // Find widgets
      expect(find.text('Demo Note-Taking App'), findsOneWidget); // App bar title
      expect(find.byType(ListView), findsOneWidget); // ListView
      expect(
          find.text('Add New Note'), findsOneWidget); // Floating action button label
    });

    testWidgets('HomeScreen Add New Note Navigation Test',
        (WidgetTester tester) async {
      // Create a NotesController instance
      final NotesController notesController = NotesController();

      // Build our widget and trigger a frame.
      await tester.pumpWidget(GetMaterialApp(
        home: HomeScreen(controller: notesController),
      ));

      // Tap on the floating action button
      await tester.tap(find.text('Add New Note'));
      await tester.pumpAndSettle();

      // Verify navigation to AddNewNoteScreen
      expect(find.text('Add New Note Screen'), findsOneWidget);
    });

    testWidgets('ItemTile Widget Test', (WidgetTester tester) async {
      // Create a NotesController instance
      final NotesController notesController = NotesController();

      // Add a sample note
      notesController.items.add('Note 1');

      // Build our widget and trigger a frame.
      await tester.pumpWidget(MaterialApp(
        home: Scaffold(
          body: ItemTile(
            'Note 1',
            controller: notesController,
          ),
        ),
      ));

      // Verify if the note is displayed
      expect(find.text('Note 1'), findsOneWidget);

      // Tap on the delete icon
      await tester.tap(find.byKey(const Key('Note 1_icon')));
      await tester.pump();

      // Verify if the note is deleted
      expect(notesController.items.contains('Note 1'), false);
    });
  }
Run the test
To execute the test, simply run the following command:
flutter test test/screens/home_screen_test.dart
If all tests pass successfully, you should see the following output:
00:07 +3: All tests passed!
You can also run widget tests on a device or emulator, which lets you watch the tests as they run and use hot restart.
Now, let's do the same thing for the AddNewNoteScreen.
Create a new file add_new_note_screen_test.dart in the test/screens directory, and paste the following code:
  // test/screens/add_new_note_screen_test.dart

  import 'package:flutter/material.dart';
  import 'package:demo_note_taking_app/controllers/notes_controller.dart';
  import 'package:flutter_test/flutter_test.dart';
  import 'package:demo_note_taking_app/screens/add_new_note_screen.dart';
  import 'package:get/get.dart';

  void main() {
    setUp(() {
      // Initialize Get test mode
      Get.testMode = true;
    });
    testWidgets('AddNewNoteScreen UI Test', (WidgetTester tester) async {
      final NotesController notesController = NotesController();
      // Build our widget and trigger a frame.
      await tester.pumpWidget(
        GetMaterialApp(
          home: AddNewNoteScreen(
            controller: notesController,
          ),
        ),
      );

      // Find widgets
      expect(find.text('Add New Note Screen'), findsOneWidget); // App bar title
      expect(find.byType(TextField), findsOneWidget); // Text field
      expect(find.text('Save'), findsOneWidget); // Save button
    });

    testWidgets('AddNewNoteScreen Save Button Test', (WidgetTester tester) async {
      final NotesController notesController = NotesController();
      // Build our widget
      await tester.pumpWidget(GetMaterialApp(
          home: AddNewNoteScreen(
        controller: notesController,
      )));

      // Tap on the save button without entering text
      await tester.tap(find.byKey(const Key('save_button')));
      await tester.pump();

      // // Verify if snackbar appears
      expect(find.text('Please enter a title'), findsOneWidget);

      // Enter text and tap save button again
      await tester.enterText(find.byType(TextField), 'Test Note');
      await tester.tap(find.byKey(const Key('save_button'),),);
      await tester.pump();
      expect(notesController.items.contains('Test Note'), true);
    });
  }
Run the test with the following command:
flutter test test/screens/add_new_note_screen_test.dart
If all goes well, you'll get a response similar to this one:
00:06 +2: All tests passed!
Integration Testing
Integration tests in Flutter are tests that verify the functionality of your application by testing multiple components or modules together. These tests ensure that different parts of your app work correctly when integrated with each other. The integration_test library is used to perform integration tests in Flutter. The package uses flutter_driver internally to drive the test on a device.
Integration tests are similar to widget tests, but they are executed directly on a device, such as a mobile phone, browser, or desktop application.
Write the test
Create a directory named integration_test in the root directory of your project. Inside this directory, create a new file named app_test.dart.
  // integration_test/app_test.dart

  import 'package:flutter/material.dart';
  import 'package:demo_note_taking_app/main.dart';
  import 'package:flutter_test/flutter_test.dart';

  void main() {
    testWidgets('HomeScreen integration test', (WidgetTester tester) async {
      // Pump the widget
      await tester.pumpWidget(const DemoNoteTakingApp());

      // Verify the initial state
      expect(find.text('Demo Note-Taking App'), findsOneWidget);
      expect(find.text('Add New Note'), findsOneWidget);

      // Tap the "Add New Note" button
      await tester.tap(find.text('Add New Note'));
      await tester.pumpAndSettle();

      // Verify that AddNewNoteScreen is pushed
      expect(find.text('Add New Note Screen'), findsOneWidget);

      // Enter a note title and save
      await tester.enterText(find.byType(TextField), 'Test Note');
      await tester.tap(find.byType(ElevatedButton));
      await tester.pumpAndSettle();

      // Verify that the note is added to the list
      expect(find.text('Test Note'), findsOneWidget);

      // Tap the delete icon of the added note
      await tester.tap(find.byKey(const Key('Test Note_icon')));
      await tester.pumpAndSettle();

      // Verify that the note is removed from the list
      expect(find.text('Test Note'), findsNothing);
    });
  }
Run the test
Plug-in your device or start your emulator. You can also run the test as a desktop application.
Navigate to your project's root directory using the command line, then input the following command:
$ flutter test integration_test/app_test.dart
If everything runs smoothly, you can expect to see an output that looks something like this:
  macbook@Macbooks-MBP demo_note_taking_app % flutter test integration_test/app_test.dart
  00:00 +0: loading /Users/macbook/Gumaan_Mahar/demo_note_taking_app/integration_test/app_test.dart   R
  00:54 +0: loading /Users/macbook/Gumaan_Mahar/demo_note_taking_app/integration_test/app_test.dart      53.8s
  ✓  Built build/app/outputs/flutter-apk/app-debug.apk.
  00:57 +0: loading /Users/macbook/Gumaan_Mahar/demo_note_taking_app/integration_test/app_test.dart   I
  02:58 +0: loading /Users/macbook/Gumaan_Mahar/demo_note_taking_app/integration_test/app_test.dart      120.7s
  03:11 +1: All tests passed!